If you’ve ever found that you’ve baked a bit too much quick bread for your family to eat while it’s fresh, never fear. It can be frozen for use later, so we’re going to tell you the exact steps from cooling and wrapping to freezing it for up to three months.

Quick bread requires minimal effort in preparing, baking and preserving. And perhaps you didn’t know it before, but the majority of quick bread freezes quite nicely. Some freeze better than others and we’re going to fill you in on those particulars as well.
Five Easy Steps to Properly Frozen Quick Bread
- Start by completely cooling your quick bread prior to wrapping and freezing.
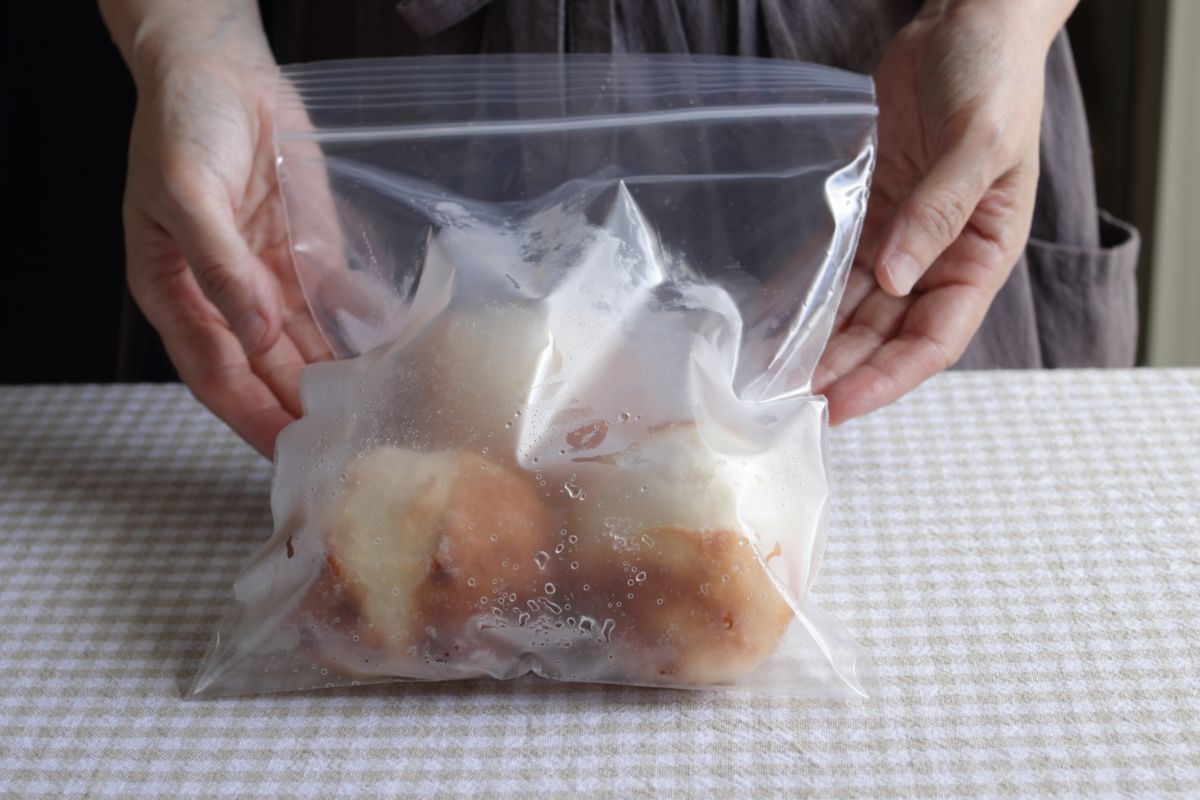
- Wrap your quick bread carefully and securely in one of the following: aluminum foil, freezer wrap, Ziploc freezer bags.
- Label the packages, using the name of your recipe as well as the date you’re freezing the quick bread.
- Place in your freezer and store at 0°F or lower.
- Use within three months.
Whether to Cut or Leave in the Pan
You’ll find that coffee cake freezes better if left in the pan that it was baked in. In addition, both coffeecakes and loaves of quick bread loaves can be sliced into individual servings prior to wrapping and placing in the freezer. It’s also of great importance to use your quick bread within the recommended time if you want to enjoy optimum flavor and texture.
Thawing Your Quick Bread
You can completely thaw your quick bread loaves at room temperature, In addition, you can also heat up your individual servings that have been frozen by using either your conventional oven or even your microwave by following these directions:
- In your conventional oven, place individual quick bread servings wrapped in foil-wrapped in your oven that has been preheated to 350°F and heat for 10 to 15 minutes. How long you heat them is, of course, dependent upon the serving size.
- In your microwave oven, simply put your individual servings of quick bread (unwrapped) on a paper napkin, plate, or towel. Then, microwave it on high for approximately 30 seconds per piece of quick bread.
More Info About Baking Quick Bread
Well, it goes without saying that quick bread is quick! And, the fact is that when you bake bread with yeast, it can be a royal pain and is also nerve-wracking. Quick bread, on the other hand, is super-easy to prepare, really attractive to look at, and, most importantly, exceptionally delicious. Not only that but it can also be easily preserved for eating later with another meal or simply when you just need a yummy piece of quick bread!

So, what are the most common ingredients that are used in making quick bread? Well, here they are:
- A fat, like one of the following: butter, margarine, oil, shortening.
- Eggs
- Flour (white or whole wheat)
- Sugar (white, brown, or both),
- A liquid (like water, milk, or fruit juice)
- Baking powder or soda
- Fruit
- Veggies
- Herbs
- Spices
- Extracts (like vanilla or lemon)
Now, one of the most important parts of baking beautiful quick bread is properly mixing all of the ingredients. So, here are some suggestions for the five steps necessary for doing that:
- Start by thoroughly mixing together your dry ingredients.
- In another bowl, mix your chosen fat and sugar, then proceed by stirring in your eggs and remaining ingredients.
- Pour all of your wet ingredients into your dry ingredients.
- Gently stir your mixtures until all of your ingredients have been mixed (do not overmix).
- Using the pan size that your recipe calls for, spray or grease or spray only the bottom of your pan, If you’re planning on taking your quick bread out of the pan, then use wax paper on the bottom instead of greasing or spraying. After baking is done, be sure to continue by allowing your quick bread to cool completely. Then, run your knife around the inside of your pan and your loaf will come out of your pan beautifully. Peel off your wax paper.
Please Note: In the event that your bread simply doesn’t rise then, the cause is probably undermixing. On the other hand, should your quick bread happen to have tunnels or large holes or tunnels in it, then it’s suffering from over mixing. Never fear, however, It won’t take very long to learn the proper amount of stirring that’s needed for mixing your ingredients and get a masterful loaf of quick bread.
Checking For Doneness is Easy
Checking for the perfect doneness of your quick bread can be accomplished with one of three ways:
- Insert a toothpick into the center of your quick bread loaf and it should always come out clean.
- Touch it and it will spring back if it’s sufficiently done.
- Usually, quick bread will have a crackdown in its center and when it starts looking dry, not sticky, it’s done.
Once your bread is done and completely cooled, the good news is that it’s ready to eat, freeze, or as a nice gift to someone special.
Watch Out For Botulism- Don’t Can Your Quick Bread
One last important note: Don’t ever can your quick bread although it may seem like a nice way for gift-giving or even for using later. Why? Well, the fact is that a body of research has shown that canning it can be this quite unsafe and could even cause botulism poisoning. Botulism (not the kind used in Botox) could easily kill someone or, at the least, end up causing serious health issues when someone eats the canned quick bread.
So, now that you know how to bake, freeze, and thaw your favorite flavor of quick bread, get out those bananas, nuts, cranberries, chocolate chips, or whatever you love in quick bread and get baking!
